What You Need
- ESP8266 or ESP32
The microcontroller you want to flash. - USB cable
Make sure it supports data, not only power. - Your computer
Windows, macOS or Linux — all supported.
Step-by-Step Instructions
1. Install ESPHome Web Flasher
Go to the official ESPHome Web Tool. You don't need to install anything — it runs in your browser.
Open ESPHome Web Flasher2. Connect Your ESP
- Connect your ESP8266 or ESP32 using a USB cable.
- Make sure drivers are installed if needed (Windows).
- The LED on the board should light up.
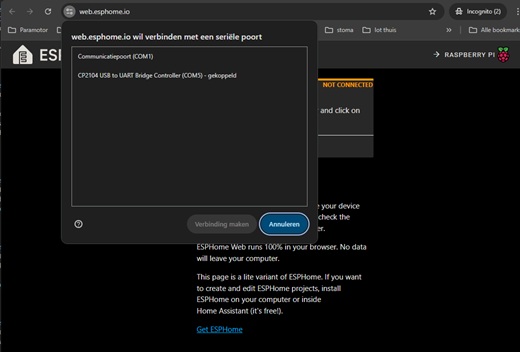
3. Press “Connect”
The browser asks permission to access your USB device. Select the correct COM/USB port.
4. Flash ESPHome
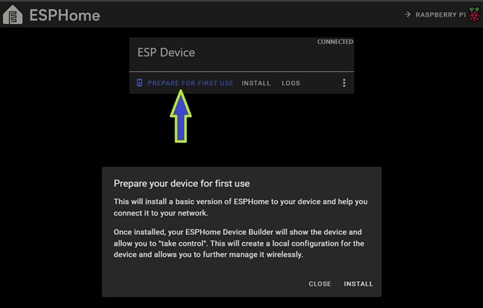
Click prepare for first use -> install and wait until the progress bar reaches 100%.
Your ESP will reboot automatically.
5. Configure WiFi
ESP will create a WiFi network called ESPHome-XXXX. Connect to it and enter your home WiFi details.
6. Add Device to Home Assistant
Home Assistant should automatically detect the new ESPHome device. Click Configure → Add.
You're Done!
Your ESP is now flashed and connected. You can start adding sensors, switches, relays — anything you like.
Learn More About ESPHome